Thursday, 11 December 2008
problems, corrections and final thoughts.
the first, as previously mentioned was with the people drinking. the glasses just wouldn't not match the hands. and after trying to move the glass in nearly every frame, i decided to just delete them. originally the scene was much darker and it was very difficult to see them any way.
another problem, was with the cocktail maker, as this seemed to move without the man being there, so this was just a case of moving the key frame down the line a little.
it was a shame about the man in the picture, as we had originally decided to have question marks, but only one member of the group put them on which made it impossible at the end to correct.
the biggest problem i had was with reactor. i had done a trial on a separate document which seemed to work fine, i then followed the same process on the actual document and it didn't seem to work the same. to over come this problem, the only thing i could do was to merge the trial version onto the actual document. this meant that i had to delete two of the lanes and tv, and just adjust the width of them to make them fit.
BIG PROBLEM occured during the trial of putting everything together, it appeared that everyone else's camera was moving from right to left, and mine left to right. although it appeared to look fine going into the next scene, it looked bad going into my scene. the only thing i could think of doing is an alternative (included in the hand in), which doesn't look so good, for the sake of the whole thing.
the lack of communication in the group made things not work out in the best possible way. this is sad, as the project could have been better if we'd worked better together. but all the same, the project looks good, and has been fairly successul.
Tuesday, 9 December 2008
knocking down the pins
to make the pins fall down i had to use reactor.
first of all i had to select the alley, pins and ball. i then went onto the reactor tab at the top and went into create object - rigid body collection. in here, it is important to make sure that all of the parts selected were added to the box, and if not it possible to go on the add tab and select another object. selecting each of the three parts in turn, i went back onto the reactor tab, and selected open property editor. here, i selected a mas of 0 for the ball, 20 for the alley, and 10 for the pins. i then selected bounding box for the alley and pins, and bounding sphere for the ball.
the only thing that i had left to do was to animate the ball so it looks like something is knocking them down. i did this by making sure the auto key was on and simply moved it to the last frame.
i had a slight problem that the ball wasn't moving fast enough, so it would get there after the pins were knocked down. there is still that problem on the actual clip, but not on the trial above.
man walking
i added in a man behind the bar, i wanted to make it look like the man was walking towards two people that were added on the side of the bar. for this, i used the footsteps, which can be found on the animation section of the toolbar to the right. this is a really simple tool to use. i simply clicked on the biped, then the foot print tool, i then selected the appropriate settings (including the amount of prints). i then positioned in the correct place,rotated them and scaled them. i done a trial before adding it to the scene as seen above. it was during this time that i found the problem with the eve lopes of the man previously made. so this was something that i had to change.
i found the footsteps tool effective, i did find it quite limiting. in that the key frames could not be moved, and as a result, the man had to walk at the beginning. it also wasn't possible to move the limbs when the footsteps was used.
man drinking
one of the first things that i decided to animate in the scene was the person drinking. at first i had glasses in the scene so it looked like they were drinking from the glass. the only problem that i had was that the glasses didn't stay where the person's hands were. i decided that the glasses were barely seen so they were deleted out of the scene. i later copied the people sitting on the sofe three more times, so that the room didn't look so empty.
Tuesday, 2 December 2008
Camera Trial
in this clip i used only 52 frames, just to have an idea about camera positioning. this just isn't enough frames, and moved round the room far too quickly.
the new man


after discovering that the previous man we made had problems when we moved the limbs, we had no choice but to start again. this was because we thought it would be quicker to start again then try to sort the problems with the previous person.
from the pictures above it is possible to see that the problem no longer exists, so the man should be able to move freely.
Tuesday, 25 November 2008
experimenting with lighting

i have been looking at lighting and the way i would like my scene to look. i have added shadows for effect, but the room is far too dark and really needs more light. i have also puts light on the light fitting above the pool table.
it looks good, but still needs more work.
i also decided to add a banner on the wall, as i felt that this would give quite an unusual look as it fades into the walls. if i can find out how to do it i would like it to glow, but if not it will probably stay the same.
problems with the person/people

there was also a number of gaps and white parts on the person, so we decided to re-make the person, in the hope that these problems will not occur again, and we know how to correct them if they do.
Monday, 24 November 2008
all together


since i first started this project there has been a number of changes to the final layout.
the room has been made bigger on a number of occasions, this is mostly to accommodate the alleys, which take up about half of the room. and only just recently, i was advised that the alleys were not long enough, so i changed the length of them, and moved the balls closer to the front.
i also changed the size of the bar as this was originally a lot smaller. but as the size of the room got bigger, it only seemed reasonable that the size of the bar got bigger. so i also added on another shelf of glasses, some more stools and a lift up piece for getting in and out of the bar.
the main thing that needs to be altered if i have time is the pool table as there are no pockets on it at the moment, and so it looks a bit unrealistic. also, the guitar could do with something to stand it in.
as far as the animation goes, i will adding a reasonable amount of lighting into the scene, and plan to animate the character, or possibly characters.
dart board and darts


the dart board was made using a simple chamfer circle tool, i then adjusted the dimensions and added the material (picture of a dart board).
the darts were drawn by using the line tool and using the lathe modifier to make it turn into a 3d shape. i then created another line drawing, adjusting the points were necessary, this was the extruded, clone and positioned. the dart was then clone 2 times, and the material was then added to the various parts.
sofa and chair


the sofa and chairs are essentially made from one picture. the sofa was made by creating a chamfer circle, the dimensions on this was then changed to the desired amount. a clone was the made of this, by the dimensions were shrunk so it fitted inside the other one, this was then cloned and put to one side. a booleon was then used to cut the middle bit out. the clone of the middle was then brought back and made longer. this was then booleoned out, so that the arms were created. the cushions were made using the chamfer square tool, and this was then made to the desired size, and placed on the sofa.
the chairs were simple clones of the sofa and scaled down and pushed in, to make them smaller.
the tables were made using a box, and chamfer circles for the legs,all set to a reasonable size.
the size of the tables were then made smaller for the chairs.
pool table
 the picture above was one of the first renders that i done of the pool table and cue. i created this table by using the chamfer circle tool, and changing the dimensions to the desired amount, as well as the fillets. i then cloned this part, and put it to one side. i then created another chamfer circle, and booleoned the side ball drop pocket out. i then took the clone back and changed the height of it. i then cloned it again, changing the lngth, and height, to make it so right through the bigger one. this was then booleoned through, to give the cut out shape in the middle. i then cloned the main part of the table once more, and yet again i changed the height of it. i also added a blue material to it. i then cloned the top part and scaled it to a more desirable size, and again the blue material was added.the legs were made out of simple chamfer circles, and made to the desired length.
to create the balls, i simply made a sphere, and made it to the desired size, using a picture as a reference, the balls were then cloned and put in a triangular shape. either red or yellow material was added to the correct ball. i later added a white ball, but this is not shown in the picture above.
i triangle was made by using the line tool to make the shape, this was then extruded and cloned. the cloned triangle was then scaled down to a smaller shape,and booleoned.
the pool cue was made by drawing half the shape using the line tool, this was then lathed, to create a 3d shape. finally a material was added to it, see below. the material was taken from a picture of a pool cue (and cropped out).
 the main problem i had with this was doing the pockets for the balls, so this has been left, for the time being.
 to make the pool table look more realistic and pub like i added some lights above it, which i will later be adding lighting effects to. i also changed the uv mapping on the cues, to make the brown bits bigger on them. i also added a white ball to the scene. to make the table better, it still needs pockets, but when i tried to put them in, they looked very bad.
Tuesday, 18 November 2008
Guitar


As the microphone turned out quite successfully, I decided to make a guitar.
1) I created two planes, add pictures of top and side on then
2) I then create box, make it roughly correct size, (box must be see-through to make easier)
4) I then selected the polygon mode, (I had to adjust the placing of the polys here), I then selected the poly where the hole is on the guitar and deleted it
5) I then select the edges on the top and bottom of the guitar and chamfer them 0.01
12) The two middle lines were selected, and using the connect tool to create two connecting edges. The pinch value also had to be defined.
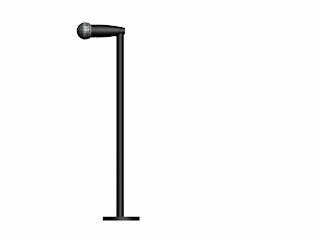
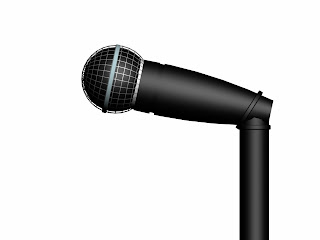
the microphone was made in the following way;
1. a cylinder was made, and adjusted to the appropriate size
2. a taper modifier was applied to the cylinder
3.a sphere was created and adjusted to the correct size based on the sized on the cylinder.
4. a tube was created around the middle of the sphere, the parameters were adjusted according to the size of the sphere. i was important to make sure the tube fitted neatly around the middle.
5. the tube was then copied 2 more times. one tube had to be placed around the point where the sphere and cylinder met, and the other quite close to the top of the cylinder. with both tubes, they had to be adjusted, for the second tube however, this had to be booleaned into the cylinder.
6. the next thing to do was to create small raiser circles, i used the chamfer circle tool for this. this then had to be copied 2 more times, and then booleaned in.
7. the sphere was then selected, and the material editor was also selected and the wire setting was turned on. the sphere was then selected once more, and copied. but this time it was made smaller, and the wire turned off, with a black material added.
8. all the other parts had material added, which was plain colours.
9. finally, a stand was added to the microphone. this was done by using the chamfer circle tool, and adjusted to the appropriate height. the tubes were then copied again, and added to the stand and microphone to have something to hold the microphone.
i later found that the height of the microphone was too short, so this had to be adjusted. overall the microphone was successful.
rearangement of alleys and adding tvs
 when I was making up the room, i noticed how bare it looked, and that two bowling alleys was not enough.
 to add more alleys I decided the best thing to do was make the size of the room bigger and increase the alleys to 6. i also moved them to the left hand wall.
 the next thing to do was to make TV monitors to show the scores.
i made these by creating a box, make sure I'd added enough segments to it. i then changed it to an editable poly, and moved the vertexes into the appropriate places. finally i cut a picture out for the score board, using photoshop, i then made a box in max and added the material.
Monday, 17 November 2008
the bar

the first thing to do was to create the bar area. this was done by creating a number of boxes and the attaching the required material to them.
 it is possible to see that here, the wood material has been altered to the wood taken from the above website. the bar stools were made using the chamfer circle tool, this was then used on all three of the circular parts of the stools.
the glass bottle were also added to the scene. a tutorial was used as support and guidance as to how to make the bottles.
the first thing to do was to create a line picture of half the bottle, using the fillet tool to create the curves on the bottle. the lathe tool was then used to create the rest of the bottle. a green material was then applied, with the bottle label on top. in the material editor, once the material was applied to the bottle, it was important to untick the tile button in the u and v sections (under coordinates). finally, i had to use the uv map modifer tool to adjust the lable to the right size.

the final thing to make the bottles look complete, was to add a piece of wood for them to sit in upside down in.
finally, a shelf was created using various sized boxed to hold the glasses. tumblers, wine glasses and bear glasses were made. this was done by drawing half the glasses using the line tool. the lathe tool was then to finish the rest of the glass. finally a glass material was added to the glasses. they were then cloned and placed on the shelves.

bowling ball rack
Wednesday, 12 November 2008
bowling balls
http://www.freebowlingtips.com/images/43396_PRETTY%20BOWLING%20BALL.JPG http://www.bowlingballs.us/images/bowling-ball-480.jpg
http://dsp.imageg.net/graphics/product_images/pG01-1135021p275w.jpg
i then used photoshop to take a small piece of the ball off the original picture.each picture was then saved as a jpeg file, and applied to the balls in max.

ymca scene - pins
the first thing i created was the pins. i found a tutorial online http://www.3dm3.com/tutorials/pins.
first of all i started by drawing half of the shape of the pin. i did find this quite hard to do, so i used a plane and put the picture from the website on it, so that i could use the picture to get a better shape.
i then used the lathe tool under the modifiers toolbar, and then a mesh smooth. finally, i had to add the material on to it. i had to use the UV map modifier to arrange the stripe on the pin, i also had to change the size of it.

Wednesday, 29 October 2008
final thoughts
if i was to do the project again, i would do the sphere part again, and this would hopefully resolve some of the problems i had later on, and allow me to continue with the project.
the face didn't turn out too badly, but i thought it could have be been. unfortunately time was not on my side, and i could only get so far with it. i would also have like to have made a proper neck.
final stages
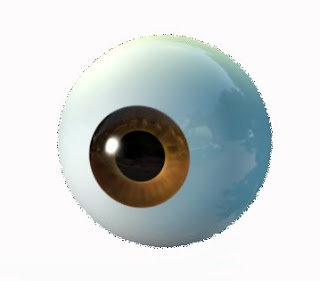 the final thing to do with the face was to add a skin material, this was done by selected a small area of skin on the photoshop picture and cropping it, and saving it as a jpeg picture. this was then added to the head by using the material selector and adding the material. using the uv modifier, the skin material was then transformed to more realistic shape. (i'm not sure if was the correct way of doing it, but this was done just to make it look more realistic).
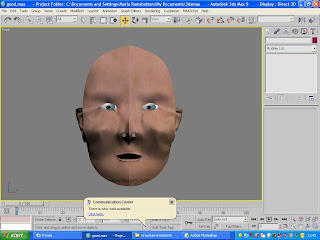
stage 7 - the ears
1. lines were drawn on the photoshop picture to show the holes and ridges in the ears.
2. the photoshop picture was then re-loaded into the plane
3. the line tool was then used with the snaps, to create the basic shape of the ears.
4. one of the polys was then selected and transformed into an editable poly
5. it was then possible to attach the rest of the polys using the attach tool
6. once this was done the needed to start to take shape, so in the same way as before, the outide vertex were pulled to the side of the ear, and so on.
7. in the same way as before, the next line of vertex were pulled to slightly before the previous ones, and so one.
8. a basic shape was then formed of the ear, but the bumps and holes were not on the ears. using the poly selection (under edit poly), it was important to choose the polys that make up the hole in the ear.
9. choosing the chamfer tool under edit edges, this should then create a box around the polys. some of the boxs are a little messy and have triangles in them, so i used the collapse tool to get rid of these.
10. i then used the in insert poly tool, and pulled the polys back into the ear.
11. i also repeated the process for the hole at the top of the ear.
12. i then selected the edges of the ears, and using swift i pulled these done to creat the round shape of the ears.
13. i had to then creat some backs of the ears, and this was done by using the creat tool under the poly section (but only the tops and bottoms of the backs of the ears.
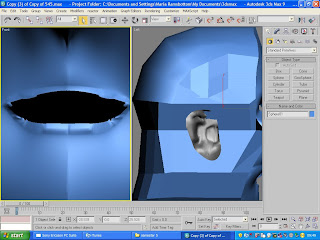
14. the final thing was to attach the ear to the back of the head. the ear was in the correct place. however as previously mentioned the symetry tool was missing, it was not possible to attach one ear and the computer automatically add the other. so i had to do it by eye, and use the attach tool to add the ears. for the right ear, a mirror tool had to be used to transform the ear, so it looked correct.
a few problems
this picture demonstrates how far i had got before i realised the lips were wrong.
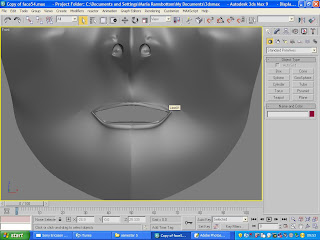 as you can see the lips are correct in this picture
as a consequence of not doing the sphere process again it did mess up the symmetry on the head, so it was no longer there, and that is one of the reasons why i could only get so far. if i had more time, i would have had to do the back of the head again, and this would have allowed to go further with the head.
stage six - the back of the head
1. a sphere shape was created to roughly the correct size.
2. the scaling tool was selected, and the sides of the sphere were scaled to the shape of the head (bear in mind that the pictures of the head on the planes were visible)
3. the sphere was then rotated (in the left view port) so the circles that make up the sphere are clearly visible.
4. on the modifier panel, the edit poly modifier was then put on.
5. the next step was then to get rid of some of the sphere that is not needed. this is done by selecting the pain selection region tool and selecting all the polygons that are not needed. (the transparent tool may need to be switched on, so that it is possible to see the picture of the head). it was important to select the polygons that are below the tops of the ears, the middle circles and up to the top of the head.
6. the next step step was to drag out the polys to attach to the front of the head, and downwards.
7. once this is done, the weld tool was used to make sure all the vertex were together, and could easily be manipulated.
8. finally the using the attach tool it was important to make sure the back of the head was attached to the front.
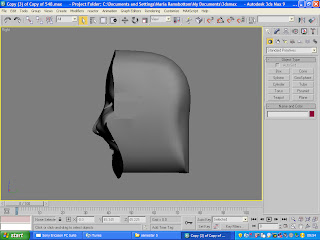
As you can see from the above picture, one of the things that went wrong with the head was the fact that a proper next was not created, so it looks a little strange. this was mostly because when i tried to do it, the shape didn't seem to go very well, and time was not on my side. so rather then waste a lot of time on that i decided to move on to the next thing, then it was difficult to go back and correct it.
Tuesday, 28 October 2008
stage five - features
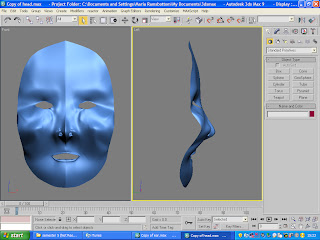
The next thing to do was to create some nostrils and lips. the lips was done by going on edit poly, selecting the edges and holding down swift i then dragged the lips out. the polygons were then selected and extruded. the vertex were then moved to the desired places to make them look more lip like. there were gaps in the lips, but this just required me moving the vertex's over to fill the gaps. various single vertex also had to be moved again to create the shape. the nostrils were made by using the create tool to make new polygons. once the polygons were made they were selected and pushed back into the head.
it is important to note that when the features were being added to the face the symmetry modifier was not on, so effectively only half the face was being manipulated.
stage four

the next step in the process was to pull all the points out to make the shape of the face. in the picture it is possible to see that the face has been put together complete. but before this step i had to start with the outside vertex and pull them out towards the edge of the face in the left view port. i then had to pull the next line of vertex out, and so on. i had to make a lot of adjustments by eye and as a consequence there are a few creases which shouldn't be there. the symmetrical modifier was then put on.
Monday, 13 October 2008
lesson two/three face
during lesson two i started to build the face picture up. we started to make sure all the lines of the face were correct. during this point i had to make quite a few alterations to the lines i originally made, as there were quite a few triangles on the face. these have to be alimented as they will cause problems when building the face into a 3d format.
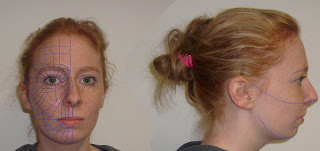 in the final part of the lesson i had to build two planes and add the pictures to them. so i selected the plane tool, added the picture by using the materials button or m on the keyboard. i then had to adjust the pictures, so uv transform button was selected under the modifications section. i then adjusted the size of the picture and using the gizmo button i could then move the picture (the front profile picture) so it was facing the front. i then had to make another plane and attach it to the side of the other, the gizmo was then selected and the picture was moved into the middle of the plane. (it was also necessary to adjust the size of the picture)
 lesson three;
i started to build up the lines in 3d max. this was done by making sure the "magnet" button was switched on, as well as choosing corner to corner on the line tab. this took quite a long time as i had to make sure there were no triangles in the 3d part.

Wednesday, 8 October 2008
lesson two/three ymca
during this lesson we started to look as a group the way in which the ymca is run, and the activities they provide. this will then be used in the animation as a way of promoting the ymca as an orgainisation. we choose to focus on the whole of the ymca as apposed to a certain aspect of it. this is because we felt that teenagers (who are the target audience) would rather have an understanding of everything the ymca has to offer them.
we then started to brainstorm the ideas as shown below. the idea that we decided to focus on however, was with a child that walks through different rooms. starting from a young age and progressively getting older.
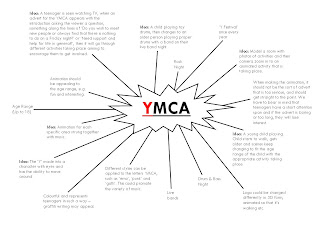
lesson three;
we started to look at the chosen idea, and the way in which we can develop it into an animation sequence.
we decided however that the animation will be slightly changed during this lesson. we decided that we would change the character from being a 3d model to being in the form of a 2d shape that walk sand moves across the screen. we got this idea from looking at the ymca website (chelmsford), and on there they have a picture which is made up of silhouettes, which is what our character will look like in the animation.
there are four people in the team so we devided the 4 rooms between us, they are as follows:
Wednesday, 1 October 2008
ymca project ideas
-a letter y that has eyes and the ability to move
-a letter/s that can play instruments
-but y is the star
- the letters could have different styles, goth, emo etc
visit to the ymca
they hold evening activities for all different aged children. these nights include; takeaway, band/live bands, fancy dress, casual, internet and chat nights.
they also hold breakfast and after school clubs. they have a nursery which takes 3 months to primary school.
the friday night club is a rock night. however it tends to attract alot of emo/goth people. this is something that they would like to get away from. they would the ymca to be seen as something that is available for everyone, but most importantly there is no particular group that is targeted to go these nights. this is the most popular evening, so the older age groups tends to go the ymca the most, although they would like more members.
they have annual events, and take the children to the park for sports during half term.
the way they currently promote the ymca is;
-by word of mouth
-my space/facebook
-send emails about the friday night (rock nights)
-primary school visits and send letters to parents
the less serious any new promotion is the better. this is because it is aimed as teenagers, and they do not tend to listen or pay any attention to serious things.
the icon for the ymca is a simple y, the ymca is also refered to as the y by many of it's members.
they have a lot of volunteers and part time staff so it is something hard for them to go into schools, and corrects the image tags that are associated with the nights they hold. when the children are 18 they are no longer allowed to attend the ymca as a memeber, however, they encourage them to volunteer instead so they are still involved.
Monday, 29 September 2008
lesson one
firstly, a picture of us was required, front and side views. these pictures were then put in photoshop and were placed side by side. i then had to make sure that all unnecessary background was rubbed out using the rubber tool. once the pictures were placed side by side they needed to be aligned with each other.. i did this by taking the ruler from the top of the page and pulling it down to certain features of the face i.e eyes, nose. middle mouth, top of ears etc. Taking the eyes as a starting place and used the free transform tool to turn it slightly. i also had to use other features such as the ears and nose to do this. finally, line is one colour, i used red were drawn on the face to emphasize the features, so the outline of the eyes, nostrils and any other lines, creases or wrinkles. a second colour was then selected andlines were drawn onto the face connecting the two colours (almost). this was done so you can see bone lines, and parts of the face that are slightly higher.
Wednesday, 24 September 2008
YMCA research
The YMCA helps over one million people each year, working with them at every stage of their lives.
The YMCA’s aim is to transform communities so that all young people find a sense of belonging.
The YMCA was founded 160 years ago in England. It has a long history of helping young people.
There are seven areas of help that they provide, these are:
Housing and homelessness: the YMCA is the largest provider of safe and secure accommodation in England for single men and women between 16 and 35.
Sport, Health, Exercise and Fitness: The YMCA is the largest of health and fitness services, they also promote physical activity and healthy living.
Crime and Safety: the YMCA has important work with young people in prisons and ex-offenders. It aims to reduce the risk of young people re-offending or becoming victims of crime.
Education and Skills: the YMCA offer a variety of vocational, formal and informal school- and work-based learning opportunities for young people to develop skills and achieve recognised qualifications.
Money and Work - the YMCA offer a range of services designed to help increase the employability and financial awareness of young people, helping them to find and keep meaningful jobs
Citizenship and Personal Development - the YMCA involve young people in activities that stimulate, challenge and enable them to realise their full potential.
Parenting and Family - the YMCA promotes positive family relationships. And as a result is one of the largest providers of child care and school based initiatives.
The YMCA has changed considerably since it was founded over 160 years ago, but still however works on the same principles and guidelines. It has been one of the largest growing charities and now works in over 120 countries with 30 million members worldwide.
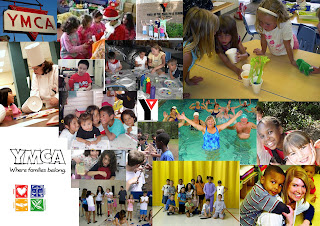
first thoughts
YMCA: the YMCA project sounds more interesting and not only this i think working in a group will ease the pressure, and work to people's strengths. the projects seems a little more broad, but more to the point a little more real and useful (or potentially useful).

